Stupefy! Fantastic Beasts titles in FCPX

This week the new Harry Potter movie “Fantastic Beasts and Where to Find Them†comes out. It looks great and according to early reviews, it’s a fantastic movie! I can’t wait to watch it.
I remember when Harry Potter and the Goblet of Fire came out. I got it as a PDF and read it in about 3 days at work. When my boss would come near I’d switch over to a boring spreadsheet. Please don’t tell him!
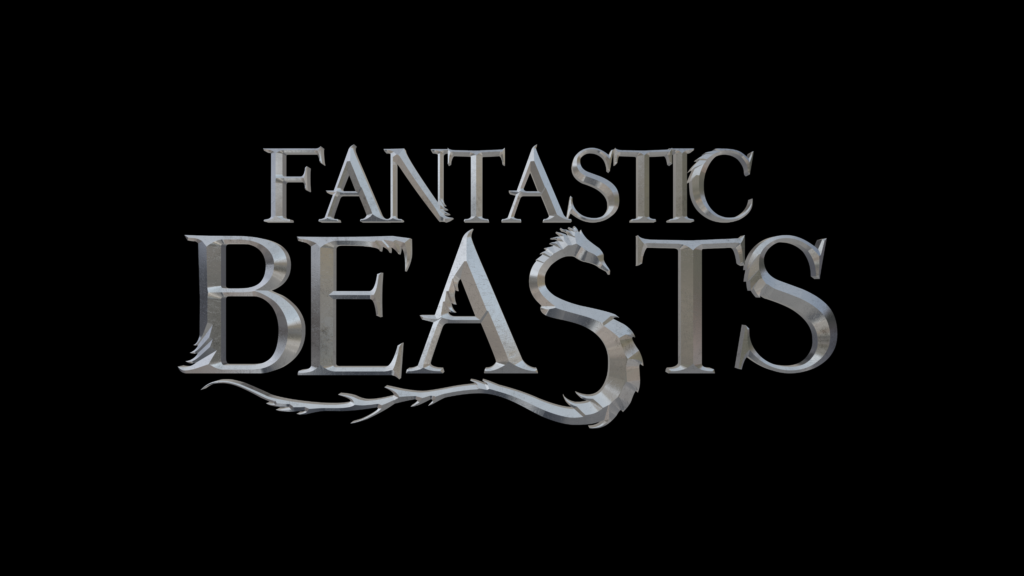
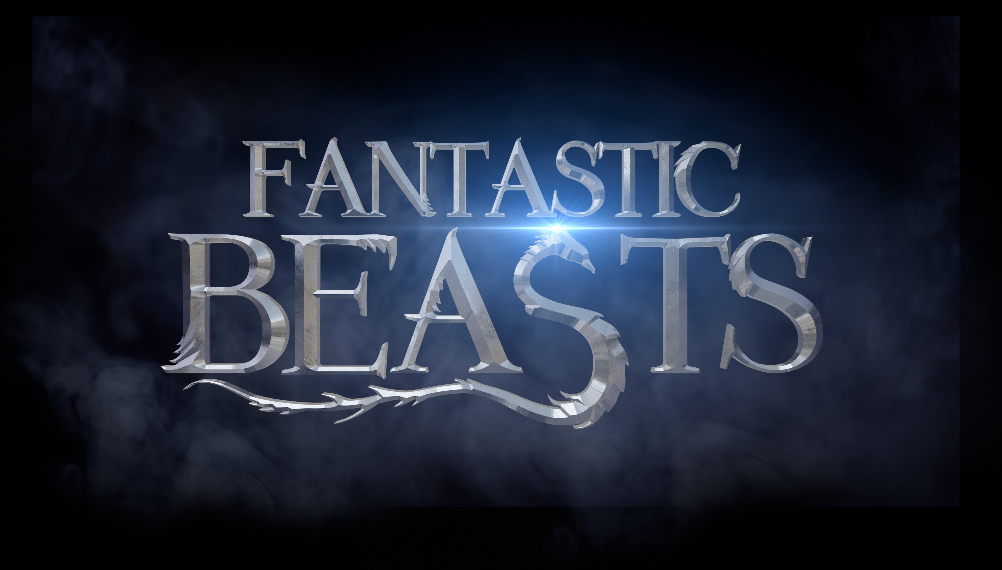
I thought it would be fun to recreate the title at the end of the Fantastic Beasts trailer. Take a look.
Here’s what you’ll create.
Let’s get started!
Accio the tutorial
You can watch how to re-create this title or read below for step by step instructions.
DOWN-lumos
You’ll need a few things to complete this tutorial and you can download them here. You’ll need a lens flare, cinematic sounds and the Fade Effect.
If you don’t want to go through all the hassle to make this title, just download my free Fantastic Beasts template.
TEXT-pecto Patronum!
Before you start, download and install the Animales Fantastic font. This is a free font made by Franco Fernandez that looks exactly like the movie font.
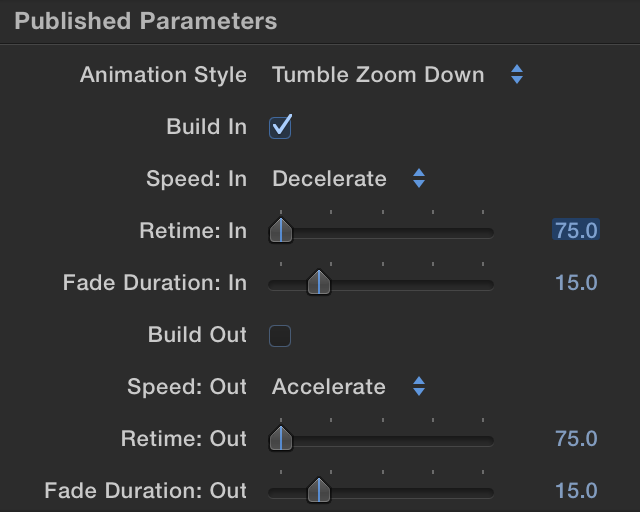
Once that’s installed start up Final Cut Pro X, go to the Titles browser and add Tumble 3D template to your timeline found in the 3D category. Disable Build Out in the settings under the Title tab.
In the Text tab, type “BEA$tSâ€. The dollar sign ($) will give us that cool Phoenix shaped “Sâ€. Check out the font’s character map for more info.
Font Settings
Set the text font to Animales Fantastic and set size to 300. Next, bring the letters closer together by setting the tracking to -10%.
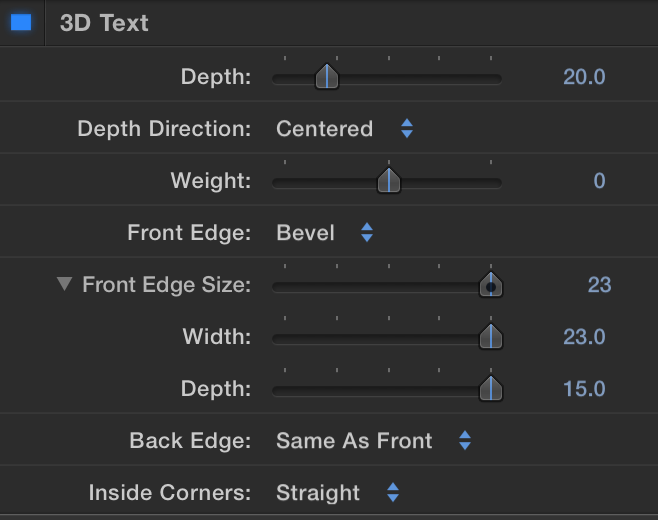
3D Text Settings
Set depth to 20. Click on the triangle to the left of “Front Edge Size†to show width and depth. Set Width to 27 and Depth to 15. This give the text a sharp edge. The picture shows 23 for Width but 27 looks better.
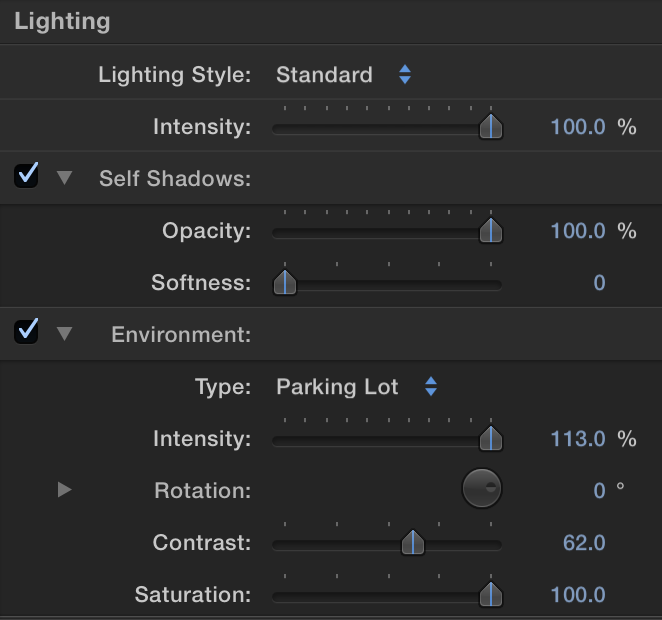
Lighting Settings
Under the Lighting section, enable Self Shadows. Open Environment by clicking on the triangle. Set Type to Parking Lot, Intensity to 113% and Contrast to 62.
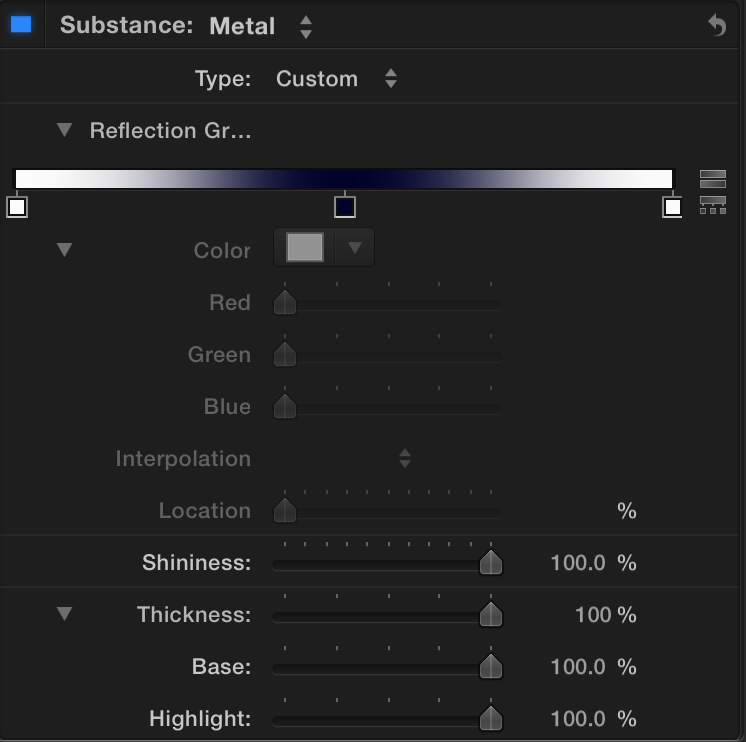
Material Settings
Scroll down to the Material section. This is where things get really interesting. You’re going to make the text look metallic and like it’s been in a wizard battle!
Change Substance to Metal and then Type to Custom. Move the middle color tag to the center by entering 50% for Location. Change the color to a dark blue. Change the two end color tags to white. Set Shininess to 100%.
But Now We’re Distressed Out
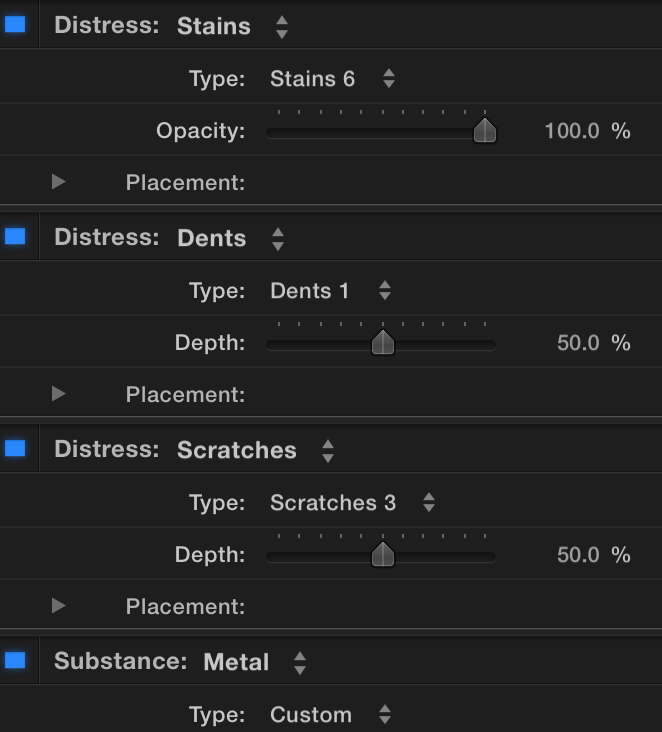
Click on Add Layer and add Scratches, Dents and Stains found under Distress.
For Scratches, set Type to Scratches 3 and set Depth to 50%.
For Dents, set Type to Dents 1 and set Depth to 50%.
For Stains, set Type to Stains 6.
Now it’s looking like magical letters!
Fake it till you make it
If you play the title, you’ll notice the letters are always in focus. You want to create a shallow depth of field like you see in the trailer. A real Depth of Field effect can be taxing on even a strong computer so you’ll fake it with a blur effect.
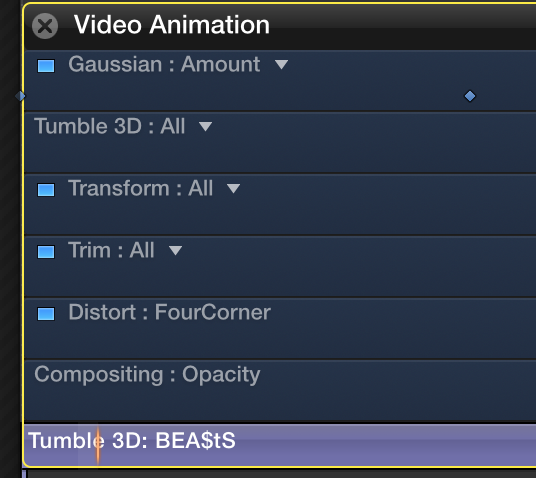
Go to the Filters browser and search for “Gaussianâ€. Drag and drop the filter onto the title. You don’t want the title blurry all the time so set an Amount keyframe at the beginning and at about 20 frames. Set the first keyframe to 50 and the second to 0.
Fantastic!
Let’s make the Fantastic text by duplicating the Beasts text. Update the text with “faNtastiCâ€, change the size to 160. After that, line up the to text templates like so.
This is looking pretty dope! It’s amazing what the font and 3D text will do!
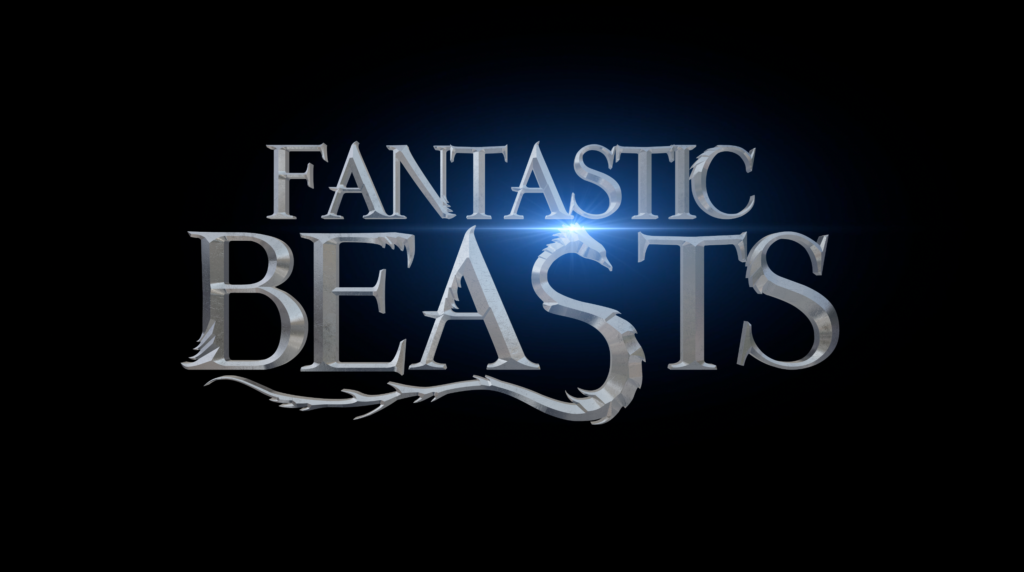
Ex-FLARE-iarmus!
In the trailer there’s a sweet looking lens flare on the top of the beast S. Drag and drop your flare above the text titles. Change the Blend Mode to Screen. Add the Fade In/Out effect (download for free) and set Out to 0. Use the Transform tool to move it to the top of the S. Now move the flare in the timeline to match up with the title animation. Line it up so that the flare comes on just as the S is settling into place.
Poof! Up in Smoke.
You’ll notice in the trailer that there is some smoke or dark clouds ( I think it’s clouds) behind the text. Let’s add an equally dark and interesting background.
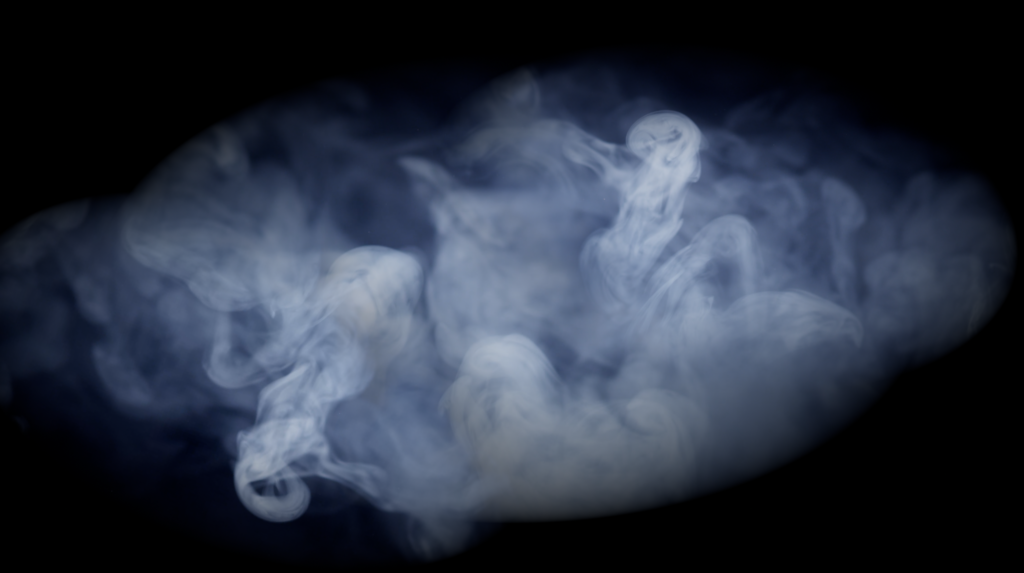
Download a smoke video from Mitch Martinez. You’ll want to bookmark his website because it’s a great source for free 4k videos. I used Smoke 40 but you can use any you want.
Add Smoke 40 to your timeline below the titles. Add a Vignette Mask from the Effects browser. Set Size to 1.2 and Falloff to .5.
Under the Transform section set scale to 90% and Opacity to 80%.
Duplicate the smoke clip and put it above the first smoke clip. Move the clip to the lower left area, set Rotation to -200 and Scale to 65%. Now use the Trim tool to change when this clip starts and stops.
Duplicate the second smoke clip and put the new copy above the first and second smoke clip. Move the clip to the upper right area, set Rotation to -10. Now use the Trim tool like before to change when this clip starts and stops.
Select all 3 clips and turn them into a Compound Clip by pressing ALT+G. Add Cool Tones and 2-Color Gradient filters to the compound clip.
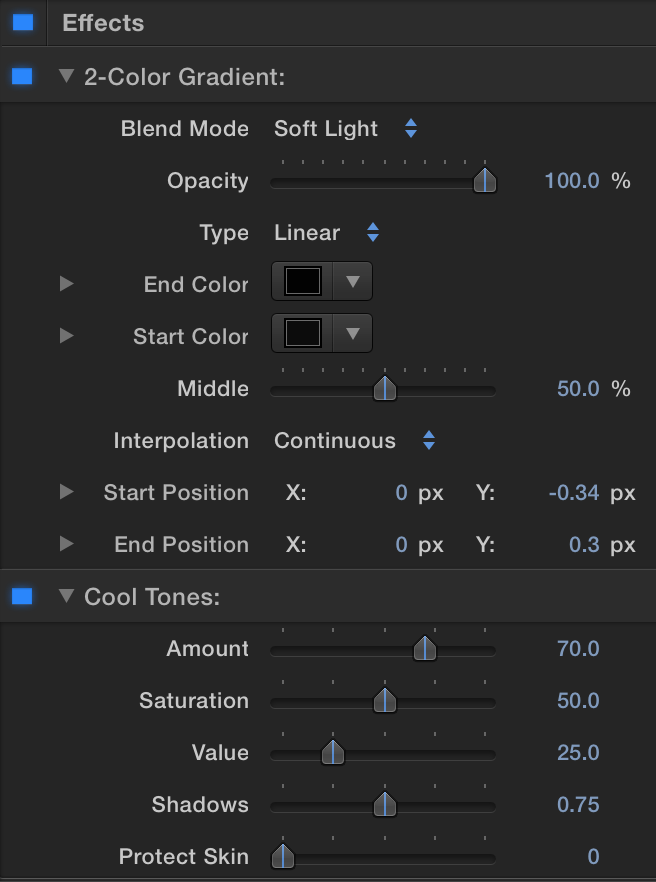
In 2-Color Gradient, change Blend Mode to Soft Light, Opacity to 100% and make both End and Start Color black. Leave Cool Tones as is.
Go into the Compound Clip and select the top smoke clip. Copy it, go out of the Compound Clip and paste the smoke clip above the flare and titles.
Move it to the center and set Rotation to 16, Scale to 70%, Blend Mode to Screen and Opacity to 100%.
Copy the Compound Clip and then select the smoke clip on top. Press Command+Shift+V to Paste Attributes.
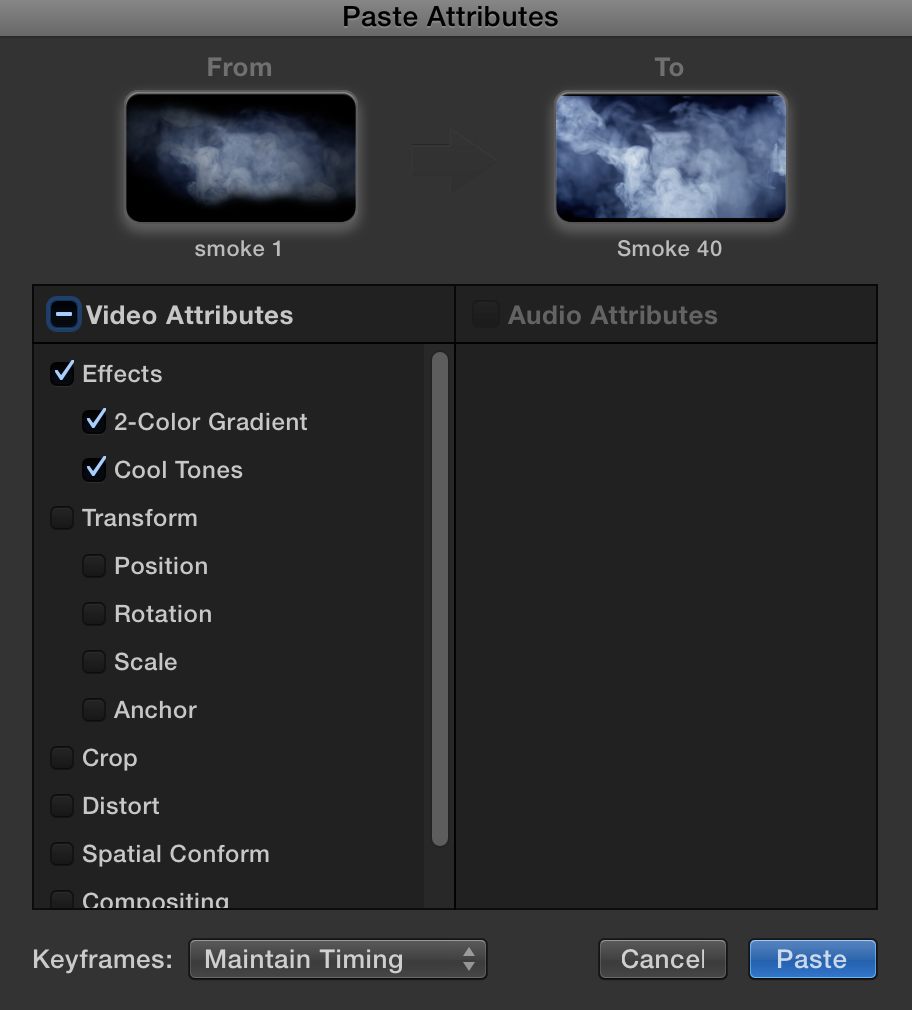
Check the Effects box and click on Paste. Next, use the Trim tool to change the start and end time of the smoke clip. This way it varies it up and you don’t have the same smoke pattern as before.
Alohomo-st done
Select the titles, flare, smoke and smoke background. Basically grab everything and make it into a compound clip. Apply the Fade In/Out filter to your compound clip. Set In to 10 frames.
Next, add the Letterbox filter and set Aspect to 2:35:1. Looks fantastic, right?
Wing-AUDIO Leviosa
You’re nearly done and this is looking riddikulus-ly amazing! Do you know what would really make this title professional? Sound design!
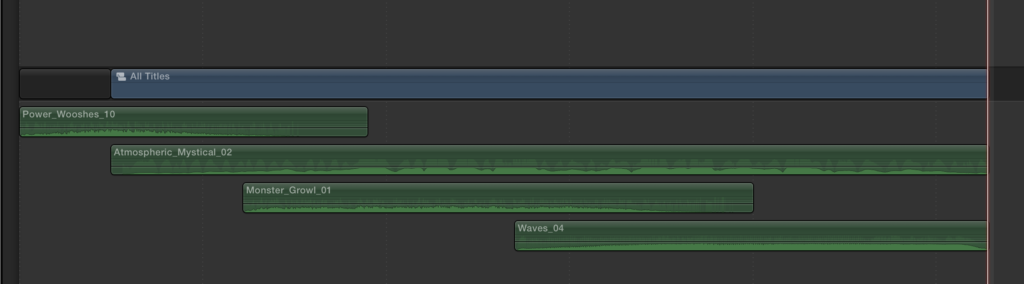
I used whooshes, growls, atmospheric sounds and waves from MotionPulse by VideoCopilot. If you need some sounds, download my audio export of this project. You can also find some great sounds at Free Sound.
Add a 1 second gap (ALT+W) at the beginning. Next connect a whoosh sound as the letters fly by the camera. As the flare lights up, add an atmospheric sound.
Next bring in a low monster grow and end with some cinematic waves.
Lumos! You’ve been enlightened.
There you have it! I’m stupefy-d by the results. You’ve created something professional and fun! If you don’t want to go through all that work, you can download my free FCPX Fantastic Beasts template.
If you have any questions or comments, let me know through a comment below.


About Dylan Higginbotham
Hey there. I'm Dylan Higginbotham, and I'm pretty dang obsessed with Final Cut Pro X plugins. Subscribe below because I love giving away free plugins and contributing great content.
Subscribe!
Get 99 Templates for Free!
($138 value)
Do you want to look professional without wasting time & money trying to learn a new skill? Well, check out some free titles, transitions and effects. You're gonna love 'em! Just click the button below to get 96 professionally designed and animated Final Cut Pro templates for only FREE!